
Your car seats are more than just a place to sit—they reflect your style and how well you care for your vehicle. When leather seats crack, it can make your car look old and worn out.
But don’t worry, you don’t have to replace them or spend a fortune to bring them back to life. You’ll discover simple, effective ways to fix those cracks and restore your seats to their former glory. Keep reading, and you’ll learn easy steps that anyone can follow to make your car’s interior look fresh and new again.
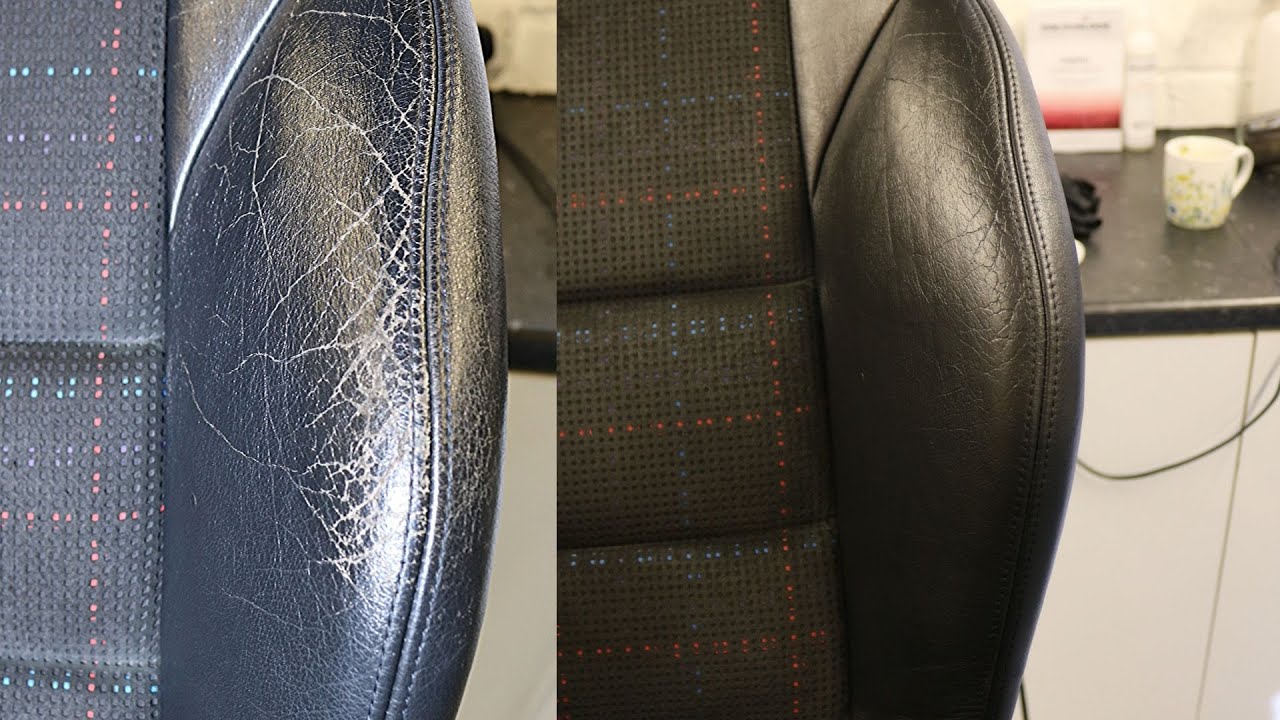
Credit: www.youtube.com
Causes Of Leather Seat Cracks
Leather car seats add a touch of style and comfort to any vehicle. Over time, these seats can develop cracks that reduce their look and feel. Understanding what causes these cracks helps in preventing damage and keeping your seats smooth and strong.
Common Wear And Tear
Daily use causes friction on leather seats. Sitting down, moving, and shifting put pressure on the surface. Over time, this wears out the leather. Small scratches and scuffs turn into cracks. Older leather, especially, loses its natural oils. This dryness makes cracks appear faster.
Effects Of Sun Exposure
Sunlight is harsh on leather seats. UV rays break down leather fibers. This causes fading and makes the leather brittle. Long exposure dries out the leather’s natural oils. The surface becomes stiff and cracks start to show. Parking in the shade helps protect seats from sun damage.
Impact Of Temperature Changes
Leather reacts to heat and cold. Hot weather dries out leather quickly. Cold weather makes it stiff and less flexible. These changes cause the leather to expand and contract. Repeated shifts in temperature weaken the leather. Cracks develop as the material loses its strength.
Tools And Materials Needed
Fixing cracked leather car seats needs the right tools and materials. Having these items ready makes the repair process easier and more effective. This section lists the essential tools and materials for a smooth repair.
Leather Repair Kits
Leather repair kits contain everything needed for fixing cracks. Kits usually include leather filler, color compounds, and texture papers. These kits save time by providing all parts in one package. Choose a kit that matches your seat color for best results.
Cleaning Supplies
Cleaning supplies prepare the leather for repair. Use a gentle leather cleaner to remove dirt and oils. Avoid harsh chemicals that damage leather. Soft cloths or sponges help clean without scratching the surface. Clean leather allows repair materials to stick better.
Application Tools
Application tools help apply repair products precisely. Small spatulas or plastic spreaders smooth out filler evenly. Foam brushes or small paintbrushes work well for color application. Keep tools clean to avoid mixing colors or damaging leather.
Preparing The Leather Surface
Preparing the leather surface is the first step in fixing cracked car seats. This step helps the repair materials stick better. Clean, smooth leather ensures a longer-lasting fix. Taking time here saves effort later.
Cleaning The Seats
Start by cleaning the leather seats thoroughly. Use a mild soap or leather cleaner and a soft cloth. Remove dirt, oils, and grime that block repair products. Let the leather dry completely before moving on.
Removing Loose Leather
Check for any loose or peeling leather around the cracks. Gently lift and trim these parts with small scissors. Removing loose pieces prevents bumps and uneven patches in the repair.
Sanding The Cracked Area
Use fine-grit sandpaper to smooth the cracked edges. Sand lightly to avoid damaging the leather further. This step helps create a flat surface for filler or glue. Wipe away dust with a clean cloth before continuing.
Applying Leather Filler
Applying leather filler is a key step in fixing cracked leather car seats. It fills cracks and smooths out the surface. This process restores the look and feel of your seats. Proper application ensures a long-lasting repair.
Choosing The Right Filler
Select a filler made for leather repair. Avoid products designed for other materials. Leather fillers are flexible and dry fast. Check the color options to match your seat. Choose a filler that is easy to spread.
Step-by-step Application
Clean the cracked area well before applying the filler. Use a soft cloth and leather cleaner. Apply the filler in thin layers with a spatula or your finger. Press the filler gently into the cracks. Spread it evenly over the damaged area. Smooth the surface to avoid bumps.
Drying And Layering
Let each layer dry completely before adding the next. Drying usually takes 20 to 30 minutes. Apply several thin layers for best results. Do not rush or use thick layers. Finish with a smooth top layer. This makes the repair blend with the rest of the seat.
Color Matching And Dyeing
Color matching and dyeing are key steps in fixing cracked leather car seats. This process helps restore the seat’s original look. Proper color matching ensures the repaired area blends well with the rest of the seat. Dyeing adds new color to worn or damaged spots. These steps improve the seat’s appearance and protect the leather from further damage.
Selecting The Correct Color
Choose a dye color that matches your leather seat closely. Test small spots on the leather before full application. Lighting affects how color looks, so check in natural light. Many leather dye brands offer color charts or samples. Pick a shade slightly lighter to avoid dark patches after drying.
Applying Leather Dye
Clean the seat surface before applying dye. Use a soft cloth or sponge for smooth application. Apply thin, even coats to avoid streaks or blotches. Let each coat dry completely before adding another. Multiple coats help achieve a richer, more even color. Avoid heavy layers that may crack or peel.
Blending Techniques
Blend the dyed area with the surrounding leather for a natural look. Use a small brush or sponge to soften edges. Lightly feather the dye beyond the cracked area. This technique hides color lines and matches texture. Blending prevents the repair from standing out. Finish by buffing the seat gently to restore shine.

Credit: www.youtube.com
Sealing And Protecting The Repair
Sealing and protecting the repair is a key step to keep your leather car seats strong. This process stops cracks from growing and keeps the leather soft. It also helps the repair last longer. Take time to do this right.
Using Leather Sealants
Leather sealants form a thin layer over the repair. This layer blocks water, dirt, and oils. Choose a sealant made for car leather. Apply it with a soft cloth or sponge. Use light, even strokes. Let it dry fully before using the seat again.
Preventing Future Damage
Protect seats from sun and heat by parking in shade or using sunshades. Avoid sharp objects or heavy items on seats. Clean seats often with a leather cleaner. Keep leather soft by applying conditioner regularly. Small care steps reduce new cracks.
Maintaining Repaired Seats
Check repaired areas weekly for any new cracks or damage. Clean gently to avoid wearing the sealant. Use a soft brush or cloth and mild cleaner. Apply leather conditioner every few months. Good maintenance keeps seats looking fresh and strong.
Tips For Long-lasting Repairs
Fixing cracked leather car seats takes effort. Keeping repairs strong and lasting is key. Small steps help protect your seats and keep them looking good. Follow simple habits to make your repairs hold up over time.
Regular Cleaning Habits
Clean your leather seats often. Dust and dirt wear out leather faster. Use a soft cloth and mild cleaner made for leather. Avoid strong soaps or chemicals. Gently wipe the seats to remove grime. This keeps cracks from getting worse. Clean seats last longer and look fresh.
Avoiding Harsh Conditions
Keep your car out of direct sunlight for long times. Sun causes leather to dry and crack. Park in shaded places or use a sunshade. Avoid extreme heat or cold inside the car. Protect leather from sharp objects that can cause cuts. Careful use helps maintain smooth, soft leather.
Periodic Leather Conditioning
Apply leather conditioner every few months. Conditioner adds moisture to dry leather. It keeps the material soft and flexible. Use a product made for car leather. Rub it gently into the cracks and surface. This prevents new cracks from forming. Conditioning keeps your seats comfortable and strong.
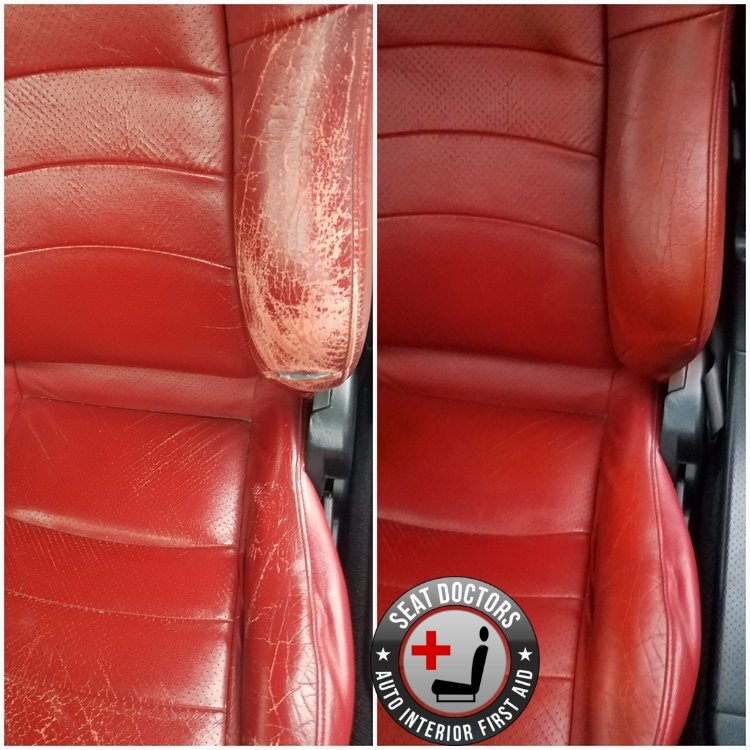
Credit: www.seatdoctors.com
Frequently Asked Questions
How Can I Repair Small Cracks In Leather Car Seats?
To fix small cracks, clean the seat with leather cleaner first. Then apply a leather conditioner to soften the leather. Use a leather repair kit to fill cracks and smooth the surface. Finally, let it dry completely for best results.
What Materials Do I Need To Fix Cracked Leather Seats?
You will need leather cleaner, leather conditioner, a repair kit with filler, a spatula, sandpaper, and colorant. These tools help clean, repair, smooth, and restore the leather’s original look effectively.
Can I Fix Cracked Leather Seats Without Professional Help?
Yes, many cracks can be repaired at home using DIY kits. Follow instructions carefully for cleaning, filling, and coloring. However, deep or extensive damage might require professional repair for best results.
How Long Does It Take To Fix Cracked Leather Car Seats?
Repairing small cracks usually takes about 1 to 3 hours including drying time. Larger or deeper cracks may take longer depending on the repair process and materials used.
Conclusion
Fixing cracked leather car seats takes patience and care. Start with cleaning, then repair cracks carefully. Use gentle products made for leather. Regular maintenance keeps seats looking fresh longer. Small cracks don’t have to mean costly replacements. A little effort can restore your car’s interior.
Keep your seats soft and strong by treating them often. Your car will feel more comfortable and look nicer. Save money and enjoy a cleaner ride every day. Try these simple steps to protect your leather seats now.