
Your car seat padding takes a lot of wear and tear every day. Dirt, spills, and sweat can build up, making your seats look old and feel uncomfortable.
But how do you clean it without damaging the padding or your car’s interior? If you’ve been wondering how to wash car seat padding the right way, you’re in the right place. Keep reading, and you’ll discover simple, effective steps to refresh your seats and keep your car feeling fresh and clean.
Don’t let dirty padding ruin your driving experience—let’s get it spotless together!
Prepare Your Supplies
Preparing your supplies is the first step to clean car seat padding properly. Having the right tools and cleaners ready makes the process easier and faster. It also helps protect the padding from damage during washing.
Take a moment to gather everything you need before starting. This preparation ensures a smooth and efficient cleaning session.
Gather Cleaning Materials
Collect soft brushes and microfiber cloths for gentle scrubbing. Use a vacuum cleaner to remove loose dirt and debris first. Prepare a bucket or spray bottle to hold your cleaning solution. Gloves protect your hands from harsh chemicals. Have towels ready to dry the padding after washing.
Choose Suitable Cleaning Solutions
Select a cleaner that is safe for car seat padding material. Mild soap mixed with warm water often works well. Avoid bleach or harsh chemicals that can damage fabric or foam. For tough stains, use an upholstery cleaner designed for car interiors. Test any solution on a small spot before full use to check for color fading.
Remove The Seat Padding
Removing the seat padding is an important step before cleaning. It helps you wash the padding more deeply and avoid damage to the seat. Take your time to handle the padding carefully. This ensures it stays in good shape for reuse.
Follow simple steps to remove the padding safely. Keep track of all parts so nothing gets lost. Clean padding means a fresher and more comfortable car seat.
Check For Removable Sections
Start by looking closely at the seat. Some cars have padding that comes out in sections. Find zippers, clips, or Velcro that hold the padding in place. These make removal easier and safer.
If you see any fasteners, use them to separate the padding. Avoid pulling hard to prevent tears or damage. Check both the front and back of the seat for these sections.
Detach Padding Carefully
Use gentle hands to detach the padding from the seat frame. Pull slowly and evenly to avoid ripping the fabric. If clips or hooks hold the padding, unfasten them one by one.
Keep the padding flat and supported as you remove it. This stops it from bending or folding oddly. Place the padding in a clean area for washing later.
Pre-clean The Padding
Before washing car seat padding, it is important to pre-clean it. This step removes loose dirt and stains. Pre-cleaning makes the washing process easier. It helps keep the padding fresh and clean.
Vacuum Loose Dirt
Start by vacuuming the padding carefully. Use a vacuum with a soft brush attachment. This removes dust, crumbs, and small debris. Vacuum all sides of the padding. Pay close attention to corners and seams. This step clears away dirt that washing might miss.
Spot Treat Stains
Check the padding for any stains. Use a mild stain remover or soap. Apply it gently to the stained area with a cloth or sponge. Let it sit for a few minutes. Then, blot the stain softly without rubbing. This helps lift the stain before washing the whole padding.
Wash The Padding Safely
Washing car seat padding requires care to keep it in good shape. Padding can lose its softness or get damaged if washed wrongly. Safe washing helps keep the padding clean and fresh without harm.
Hand Washing Method
Fill a basin with warm water and mild detergent. Gently press the padding to soak the water. Avoid rubbing or twisting the padding harshly. Rinse with clean water until no soap remains. Press out water softly using a towel. Air dry the padding in a shaded area.
Machine Washing Guidelines
Check the padding label for washing instructions. Use a gentle cycle with cold water only. Place the padding in a mesh laundry bag. Use mild detergent without bleach or fabric softener. Avoid using the dryer; air dry instead. Keep the padding flat to maintain shape during drying.
Dry The Seat Padding
Drying the car seat padding is a crucial step after washing. Proper drying stops mold and bad smells. It also keeps the padding soft and ready to use again. Patience is key here. Rushing this step can harm the padding and reduce its lifespan.
Air Drying Tips
Place the seat padding in a well-ventilated area. Let fresh air flow around it. Sunlight helps, but avoid direct, harsh rays. Turn the padding occasionally. This speeds up drying and stops damp spots. Use a fan if indoors to improve air movement.
Avoiding Damage During Drying
Never use a dryer or heater on the padding. High heat can melt or shrink the material. Avoid squeezing or pressing the padding while wet. This can change its shape. Keep the padding flat or in its normal form. Keep pets and children away from the drying padding to prevent damage.
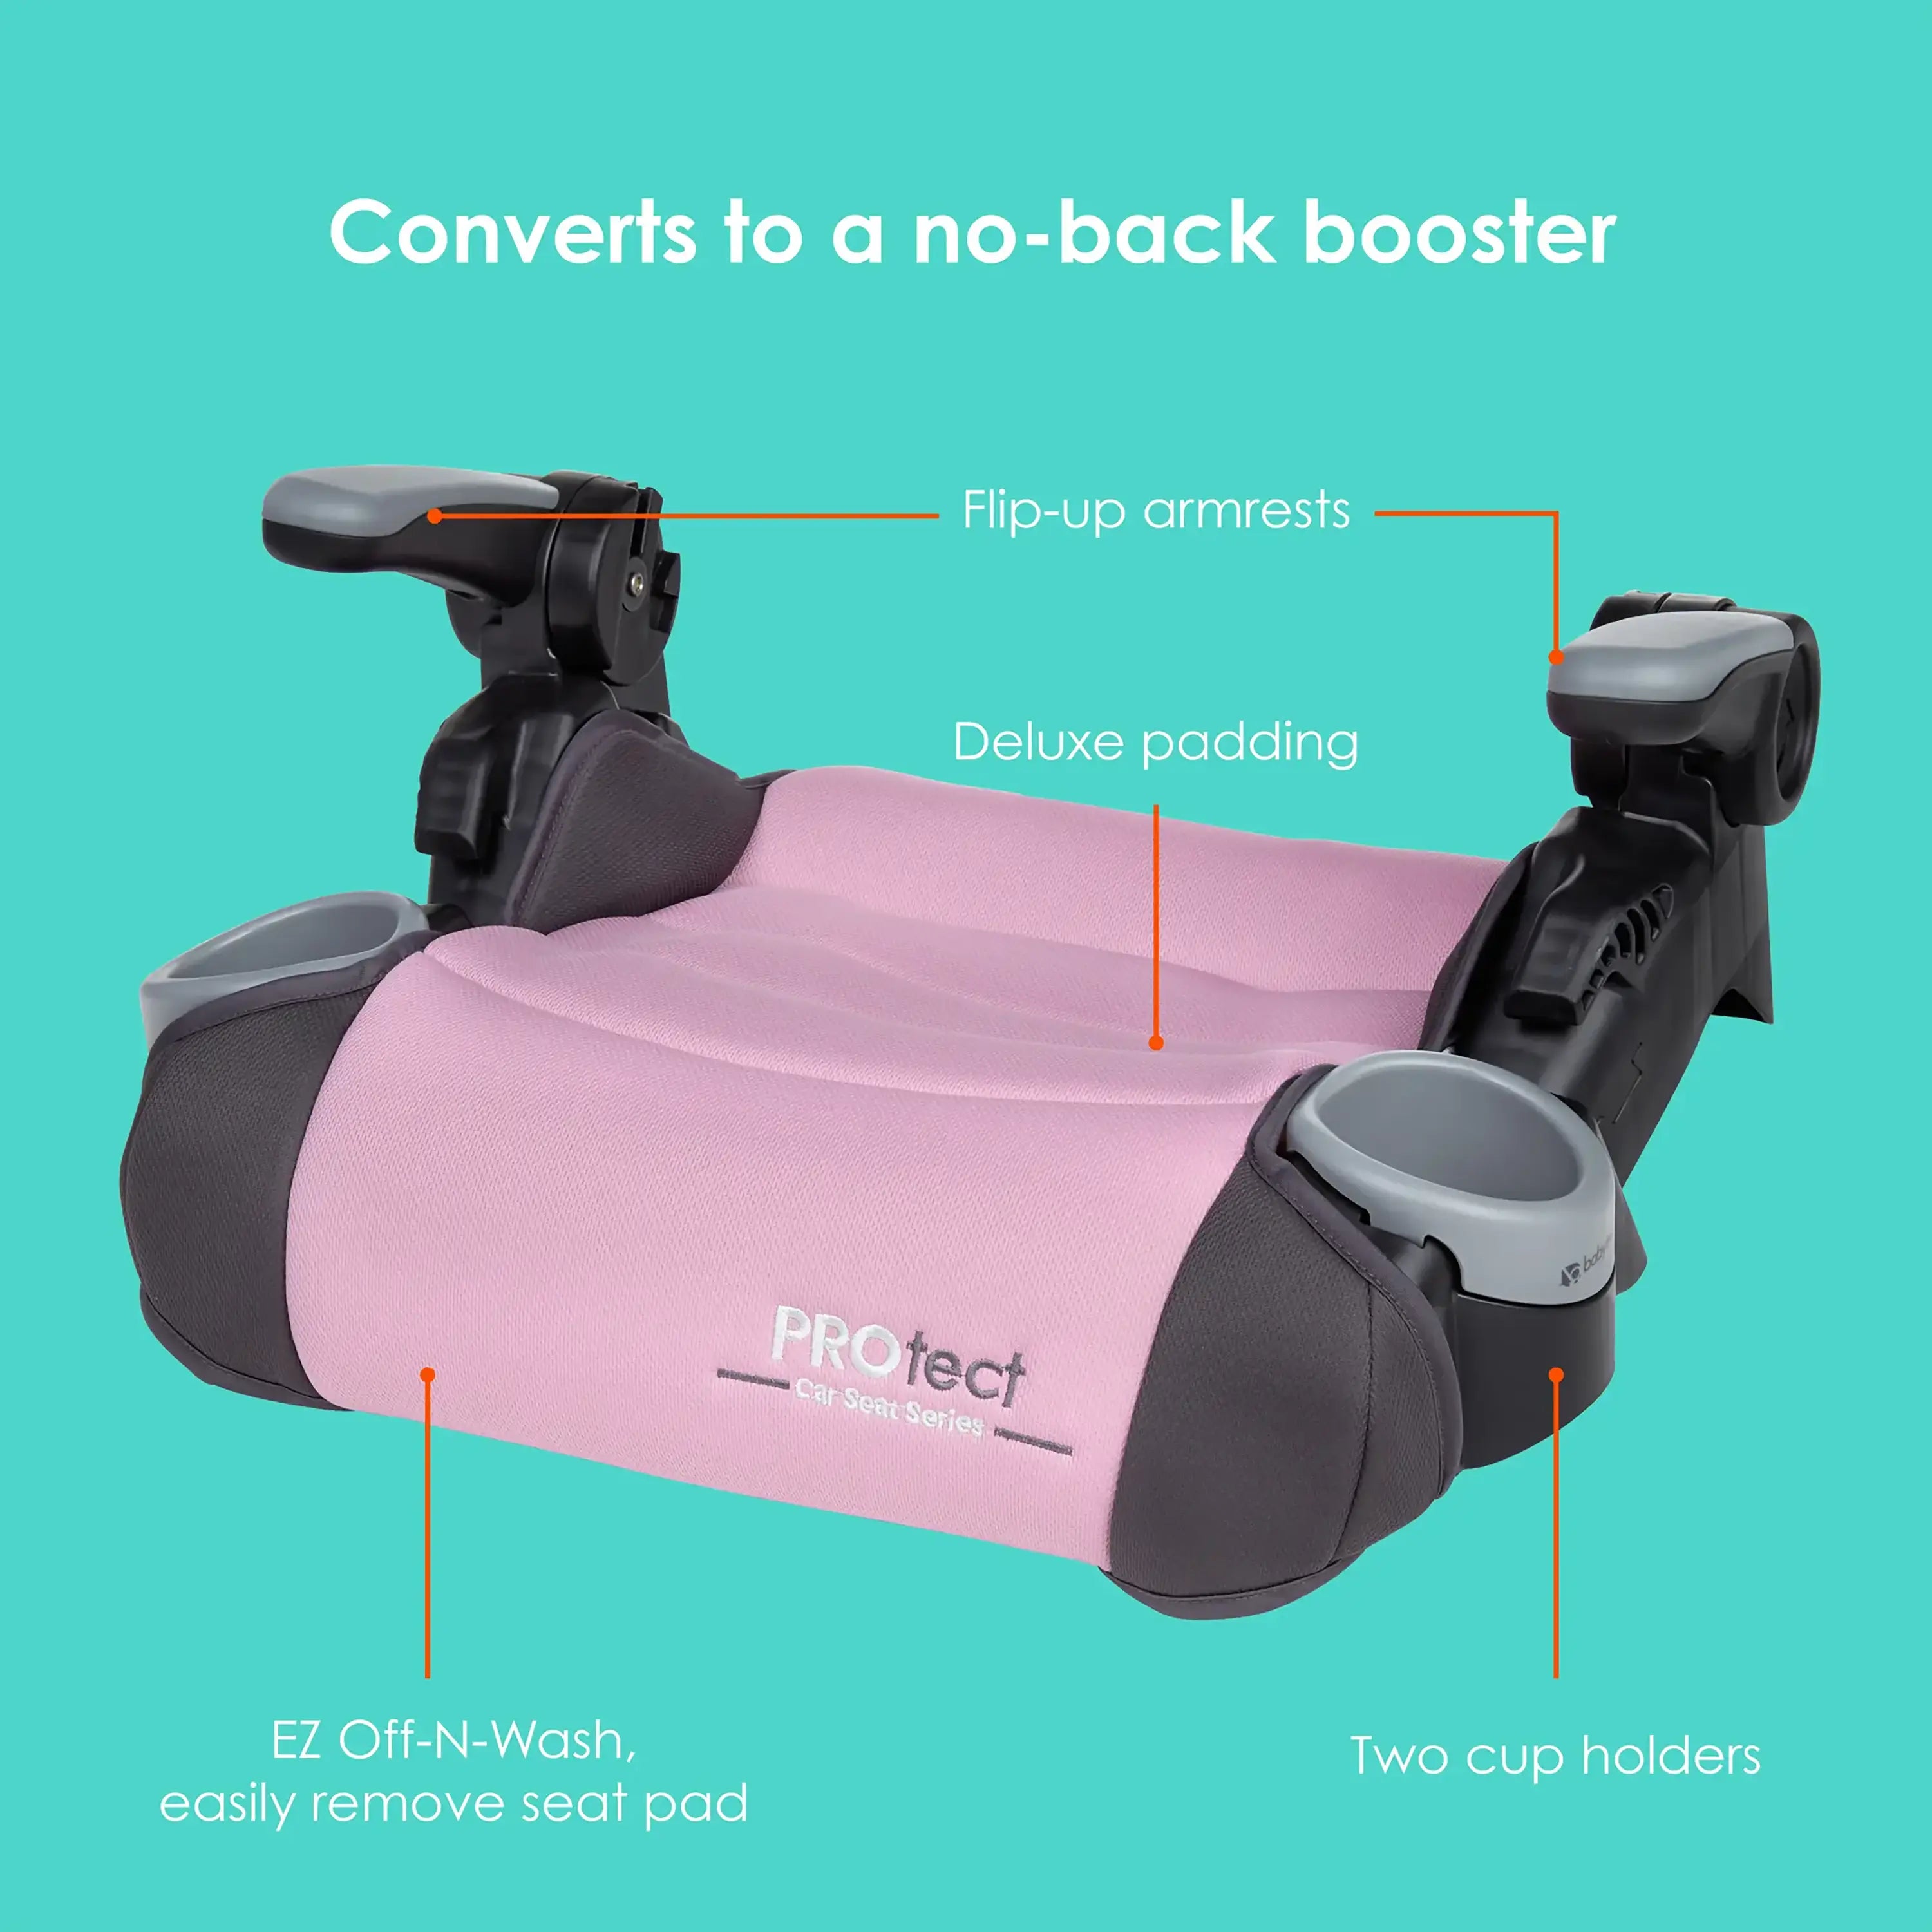
Credit: babytrend.com
Reinstall The Seat Padding
Reinstalling the seat padding is the final step after washing. It helps restore comfort and support inside your car seat. Properly placing the padding back prevents damage and keeps the seat looking neat. Follow the steps carefully for a secure fit.
Ensure Padding Is Completely Dry
Make sure the padding is fully dry before reinstalling. Damp padding can cause mold and bad smells. Air dry in a well-ventilated area for several hours. Avoid direct sunlight to prevent damage or shrinking. Check for any damp spots before moving on.
Secure Padding Back In Place
Align the padding with the seat frame carefully. Push the padding into all corners and edges. Use any clips, Velcro, or fasteners to hold it firmly. Test by pressing on the seat to feel if the padding moves. Adjust if needed to make it tight and secure.
Maintain Clean Seat Padding
Keeping car seat padding clean helps your vehicle feel fresh and comfortable. Dirt and spills can cause stains and odors if ignored. Simple habits protect the padding and extend its life. Regular care avoids tough cleaning later. Follow easy steps to keep your seat padding neat and inviting.
Regular Vacuuming
Vacuum seat padding often to remove dust and crumbs. Use a soft brush attachment for gentle cleaning. This prevents dirt from settling deep into the padding. A quick vacuum keeps the fabric looking new. It also stops buildup that can cause smells or wear.
Immediate Stain Removal
Act fast when spills happen on seat padding. Blot liquids gently with a clean cloth. Avoid rubbing to stop stains from spreading. Use mild soap and water for most stains. Clean stains quickly to prevent permanent marks. Quick action saves time and keeps seats fresh.
Credit: vixencomposites.com
Credit: www.liftingitalia.com
Frequently Asked Questions
How Do I Remove Car Seat Padding Safely?
To remove car seat padding safely, first detach the seat cover. Use gentle tools to avoid damage. Follow your car’s manual for specific steps.
What Is The Best Cleaning Method For Car Seat Padding?
Use mild soap and water with a soft cloth. Avoid harsh chemicals. Let the padding air dry completely before reinstalling.
Can I Wash Car Seat Padding In A Washing Machine?
Most car seat paddings are not machine washable. Hand washing is safer to maintain shape and integrity. Always check the manufacturer’s guidelines.
How Often Should Car Seat Padding Be Cleaned?
Clean car seat padding every 3 to 6 months. More frequent cleaning is needed if there are spills or odors.
Conclusion
Cleaning car seat padding keeps your car fresh and comfortable. Use gentle soap and warm water for best results. Avoid harsh chemicals that can damage the material. Let the padding dry completely before putting it back. Regular care helps prevent stains and odors.
Small efforts save money on repairs later. Keep your car looking neat and feeling nice. A clean seat makes every drive more pleasant. Simple steps can make a big difference. Start today and enjoy a cleaner ride tomorrow.